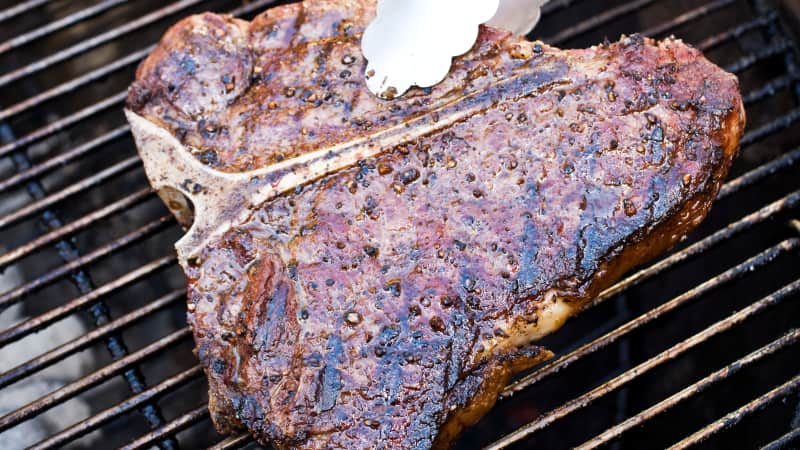
Sometimes you just want to throw a steak on the grill and go with it. No particular cut or seasonings except for some salt and the fire’s smoky char. And that’s just fine. Because unless you’re aiming for a specific regional style or flavor profile, you don’t need a recipe to grill steak. It’s a core technique, like making a pan sauce or sautéing a piece of fish, and once you know the basic tenets and visual indicators that guide you along the way, you can apply them to just about any cut and expect well-seasoned, evenly rosy meat encased in a thick, deeply browned crust.
How to Grill Steak Without a Recipe
Published June 15, 2022.

The following guidelines—culled from decades of test kitchen steak cookery and research—will help you achieve that ideal every time. After a few rounds of practice, you might even have them committed to memory.
Sign up for the Cook's Insider newsletter
The latest recipes, tips, and tricks, plus behind-the-scenes stories from the Cook's Illustrated team.
1. Choose a Good Cut
Beefy flavor and tenderness are the goals for any steak. In general, you get what you pay for, but there are a number of good options at various price points. Some of our favorite cuts include strip, rib eye, T-bone, skirt, flank, sirloin steak tips (sometimes labeled Bavette or flap meat), and boneless shell sirloin.
2. Trim Some Fat
In addition to marbling, some steaks boast a fat cap and/or fat deposits within the muscle. When the fat renders and drips onto the fire, it causes flare-ups that help create favorable grill flavor (see step 6)—but only if the flames aren’t too big or prolonged. Trimming large fat deposits away and the fat cap down to ⅛ to ¼ inch thick helps keep the blaze under control.
3. Salt and Let Rest
With time, salt will travel into the meat, seasoning it deeply and altering its protein structure to make it more tender and juicy. You’ll get the best results by salting steaks at least 45 minutes or up to 24 hours before grilling. Salting immediately before grilling is also fine, as long as the meat doesn’t sit long enough for salt to pull moisture to the surface.
- Pat them dry to remove surface moisture that would inhibit browning.
- Sprinkle them with 11/2 teaspoons of kosher salt (easier to distribute than table salt) per pound of meat.
- Let them rest uncovered in the fridge (the cold, dry air helps even more moisture evaporate).
4. Build a Half-Grill Fire
In a half-grill (or modified two-level) fire, one side is directly heated and intensely hot, and the other side is indirectly heated and cooler. The hotter zone quickly browns the meat, whereas the cooler zone provides a low-heat place to set the steaks while you temp them, while their interiors gently finish cooking, or while you wait out flare-ups on the hotter side.
5. Sear over Hot Side, Flipping Strategically
Flipping steaks that are at least 1 inch thick every minute (instead of cooking one side at a time) helps them cook faster and minimizes overcooking by taking advantage of heat transfer: When a protein is flipped, its hottest side is turned faceup, allowing some heat to dissipate while some of it cooks the protein from the top down. The more often a protein is flipped, the more it will cook from both the bottom up and the top down. The steak will gradually develop a deep, even crust. (Note: For thinner steaks, such as skirt, flip once, halfway through cooking.)
6. Encourage Small Flare-Ups; Avoid Large Ones
Flare-ups happen when fatty juices drip onto the fire. Small, quick bursts are responsible for the smoky, savory, deeply browned compounds that we associate with grill flavor; larger, prolonged flames will burn the food and deposit a layer of soot
- To Calibrate Favorable Flare-Ups: Trimming fat (see step 2) will encourage ample, not excessive, flames. If marinating or basting with a fat-laden liquid, let excess liquid drip off before putting the steak on the grill.
- If Big Flare-Ups Occur: Move the steaks away from the flames. Eventually, the fat will burn off and the fire will die down.
7. Monitor Doneness
Relatively thick steaks (11/4 to 11/2 inches thick) cook through in 8 to 14 minutes; thinner ones in 4 to 8 minutes. Start temping them at the low end of that time range.
- How to Temp: Lift each steak off grill and insert thermometer through its side to check for desired doneness: rare (115 to 120 degrees), medium-rare (120 to 125 degrees), or medium (130 to 135 degrees).
8. Rest Briefly
Muscle fibers in meat contract during cooking. To help them relax and hold on to more moisture when sliced, let steaks rest on a wire rack set in a rimmed baking sheet (to keep the crust dry), loosely covered with aluminum foil, for 5 to 10 minutes.
9. Slice Thin; Salt Slices
Slicing thin and against the grain shortens muscle fibers, making all cuts seem more tender.
Large crystals of flake sea salt (such as Maldon) add a delicate saline crunch to the meat’s crust. It’s especially important to season the sliced steak if you didn’t have time to let the salted meat rest before cooking.

