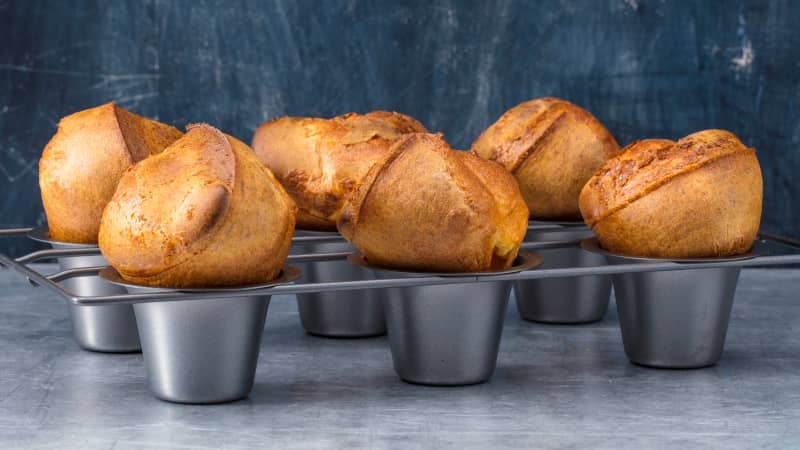
I made a lot of popovers when I was in high school, which might give you the impression that I was a very sophisticated teen. I wasn’t. I made them because the recipe was easy and required only inexpensive pantry ingredients, which made popovers a perfect after-school snack for my siblings and me. I mixed together milk, eggs, flour, and salt; poured the mixture into the wells of a preheated, greased muffin tin (we didn’t have a specialized popover pan); and baked them in a hot oven, turning down the temperature halfway through baking to prevent the outsides from burning while the insides finished cooking. When all went well, the cups of batter ballooned dramatically into crisp, hollow shells with creamy, custardy interior walls, and I felt like I had invented fire.
No-Fail Popovers
Published Dec. 7, 2020.

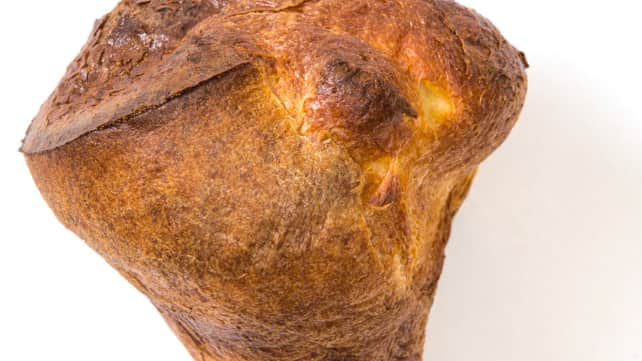
Elements of a Perfect Popover
Maximally popped
Bread flour produces a popover that’s 30 percent taller; weighing the flour ensures that the batter is always the right consistency for the best rise. Warming the milk leads to more oven spring.
Crisp exterior/custardy interior
Heat rapidly gels the surface of the batter so that when the moisture inside turns to steam and expands, that surface is able to stretch to retain it. Low-fat milk ensures the crispest results. Eventually the exterior dries so much that it forms a rigid shell, halting expansion and leaving the interior moist and soft.
Well-formed base
Starting with a cool pan that’s only lightly greased allows the batter to stick to the sides of the cups for bases that are full and round instead of shrunken.
But it didn’t always go well, even though I always used the same recipe. About 25 percent of the time my popovers were squat and spongy, like damp, bland muffins. Other times I’d lift seemingly perfect popovers out of the tin only to reveal bases that were comically shrunken. (We ate all these imperfect specimens; we were teenagers.) Over the years, I grew exasperated with my frequent inexplicable failures, so I stopped making popovers. But now that developing foolproof recipes is my job, I felt ready to confront the challenge anew. I’d figure out what makes popovers pop (or not pop), and I’d test all aspects of their production to find a formula and baking method that guaranteed success every time.
Steam Powered
There’s not much written about what makes popovers pop, but our science research editor, Paul Adams, confirmed my suspicion that the science is similar to that of pitas and cream puffs: The oven’s heat rapidly gels the surface of the batter so that when the moisture inside turns to steam and expands, that surface is able to stretch to retain it, leaving a growing hollow inside. Eventually the exterior dries out so much that the protein in the eggs and flour forms a rigid shell, halting expansion. The inner walls, protected from the fiercest heat, remain moist. Equipped with this new insight, I hit the kitchen and made five popover recipes that varied in their choice of flour, choice of milk, number of eggs, mixing methods, and baking temperatures.

It wasn’t an auspicious start. Two batches—those made with the thickest batter and with the runniest batter—resembled my teenage failures: stunted, squishy, and sad. Was batter viscosity the variable that made the difference? A series of tests in which I varied only the amount of flour convinced me that it played a large part. Thin mixtures made weak popovers that couldn’t contain their steam, while thick mixtures never generated enough steam for lift.
As a kid, I had measured my flour by volume, so I was probably adding subtly different amounts each time, which led to the occasional failure. Going forward I’d make sure to weigh it so that I’d always have the proper ratio of flour to liquid. For my working formula, I landed on 6¾ ounces of all-purpose flour, a bit of salt, 1½ cups of whole milk, and three large eggs. It produced popovers that popped reliably, though they weren’t as tall as I’d hoped. Perhaps tweaking the ingredients would help.
Seeking Optimal Lift and Crispness
With my new understanding of popover mechanics, I suspected that the extra gluten-forming protein in bread flour would make the batter even stretchier and thus produce loftier popovers. It did. Not only were popovers made with bread flour about 30 percent taller than those made with all-purpose flour, but their higher walls were also thinner, making them a bit more crisp, and that crispness held up as they cooled. Bread flour was in. Next up: the milk.
Look Familiar?

Even if they achieve an impressive height, popovers are often marred by bases that look comically small in relation to their expansive tops. See “Elements of a Perfect Popover” for the simple steps that we took to prevent this common flaw in our recipe.
In the test kitchen, whole milk is our default, but, wondering if low-fat or even skim milk might be better, I made three batches of popovers, each with milk of a different fat level. There wasn’t a huge difference in stature, but I did notice a slight difference in texture: The lower the proportion of milk fat, the crisper the popover. Skim milk made slightly more crisp popovers, and those made with whole milk were a bit softer. But the differences were so slight that I went with low-fat milk because that’s what many cooks are likely to have on hand. And besides, the next ingredient under consideration—butter—had a bigger impact. Though many recipes call for adding melted butter to the batter, I found it to have an even greater softening effect than higher-fat milk. I’d omit the butter completely and save it for spreading on my baked popover, where I could really appreciate it.
Temperature Control
But about those popover-pan cups: Should they be hot? Should they be greased? My standard high school MO was to combine both of these: Heat the pan with a bit of fat in each cup and then pour in the batter. This method yielded popovers that were light, expanded, and crisp, but it also yielded the greatest number of shrunken bases. The heat from the pan seemed to jump-start the rise, but that hot fat prevented the batter from gaining purchase on the sides of the cups. Adding cold batter to cold, very lightly greased cups ensured just enough grip for the popovers to have full, round bases, but overall they weren’t as tall.
Early heat clearly helped the rise, but maybe that heat could come from the batter instead of the pan. In fact, maybe that was the principle behind recipes that called for room-temperature milk and eggs, whose popovers tended to rise higher than those made with cold ingredients. But I was reluctant to have to think that far ahead when I made popovers. My solution: use fridge-cold eggs, but warm the milk to 120 degrees in the microwave. This warm batter made towering popovers. Now to refine the baking method.
A Muffin Tin Works Fine
No popover pan? No problem. You can bake the batter in a muffin tin. The popovers won’t be as majestic as those baked in the deep wells of the specialty pan, but they’ll still turn out appealingly crisp on the outside and custardy within.
Most popover recipes call for a two-step bake: Start hot to make the most of that initial pop, and then adjust to a more moderate heat to prevent burning. But because some ovens lose heat more quickly than others, lowering the temperature halfway through can throw off the timing. I prefer to bake at a single, constant temperature; the trick was zeroing in on just the right point on the dial. At a steady 450 degrees, the exteriors burned before the insides were fully set, so those popovers were gooey inside and softened quickly. At 375 degrees the resulting popovers were small, with thick, fleshy interiors. My sweet spot was 400 degrees.
Buttered popovers are a great accompaniment to dinner, and they take far less time to make than rolls. Or drizzled with honey or smeared with jam, they make a delightful breakfast, brunch, or snack. With a recipe this straightforward and reliable, I can easily see myself returning to my teenage levels of popover production.

