As a young student of the culinary arts, there were a handful of “commandments”—central tenets of good cooking—that each of my mentors persistently reinforced (read: screamed). One such precept, which has been indelibly seared into my cortex, is that heat equals flavor. Heat browns meat, caramelizes sugar, and extracts body-giving gelatin from bones. Heat also creates aroma, concentrates flavor compounds, and melts unctuous fats. If heat is so great (which it is), why on Earth am I promoting the practice of combining ground coffee with room-temperature water and letting it infuse slowly for hours? The answer lies in the fact that heat is indiscriminate.
How To Make Cold-Brew Coffee
Caffeine nerds can rest (or wake) easy with a foolproof method for incredible iced coffee.
Published Aug. 17, 2011.

Exposed to far less heat, cold-brew is significantly less acerbic than its sweltering sibling.
It’s true that coffee brewed at 210 degrees will contain more aroma compounds, dissolved solids, and flavor than coffee brewed at 72 degrees. But this is one case where more isn’t necessarily better. Along with the good stuff, heat also extracts the majority of bitterness and astringency found in hot-brewed coffee. Exposed to far less heat, cold-brew is significantly less acerbic than its sweltering sibling. Less bitterness means that the subtler flavors found in coffee beans are more perceptible. For me, good cold-brew balances hints of dark chocolate, caramel, ripe black fruits, and vanilla with a pleasant viscosity, mild acidity, and pitch perfect bitterness. If my description sounds florid to you, it’s probably because you didn’t have cold-brew this morning. In all honesty, it’s lush, nuanced, and incredibly smooth.
Still, cold-brew does have its critics (myself at one time included). Naysayers complain that cold-brew lacks the body and complexity of flavor of a heat-extracted brew. Over the years I’ve tried to extract more richness and complexity from cold-brew coffee, in the hope of achieving the best of both worlds. I’ve tried a number of out-there techniques including an initial hot water bloom (there’s that heat again); near-continuous agitation; and five-day-long extractions in the fridge. But none of these techniques improved my cup of cold-brew. What they did was turn a simple, satisfying process into a chore.
After reconciling my love of cold-brew with years of heat-focused culinary indoctrination I am now ready to pass along my own commandments on how to make good cold-brew coffee. I promise not to yell.
Step #1: Roast It
I use medium roast beans (left), which have been heated to a lower temperature than dark roast beans (right). Medium roast tastes more like coffee beans and less like the roasting process. You always want to freshly grind whole beans right before you're ready to brew.
Step #2: Pour It
I combine room-temperature water (usually filtered, as my tap water doesn’t taste great) and freshly ground coffee in a large French press. The press makes it’s a snap to separate the concentrate from the grinds after brewing.
Step #3: Stir It
After about 10 minutes, a solid raft of coffee grinds will form on the surface. I find it important to stir this raft into the water to maximize contact with the ground coffee.
Step #4
After the initial stir to combine the ingredients, this is the only other time I stir during brewing. As I mentioned before, agitation is last on the list of factors affecting extraction. I find it a nuisance to stir a batch of cold-brew multiple times over the course of a day; the good news is I don’t have to.
Step #5: Cover It
Next, I cover the French press with plastic wrap and let it sit at room temperature for 24 hours (give or take an hour in either direction). I’ve done room-temperature brews as short as 12 hours and as long as 72 hours. Twenty-four hours is consistently the sweet spot.
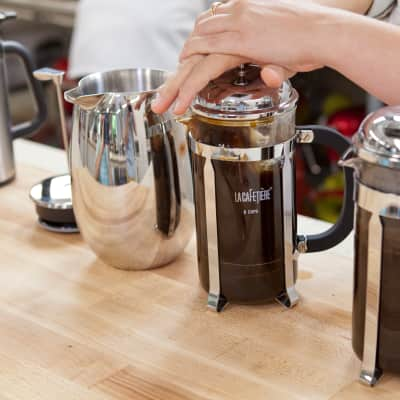
Step #6: Press It
After 24 hours, I remove the plastic wrap and press the grinds to separate the concentrate.
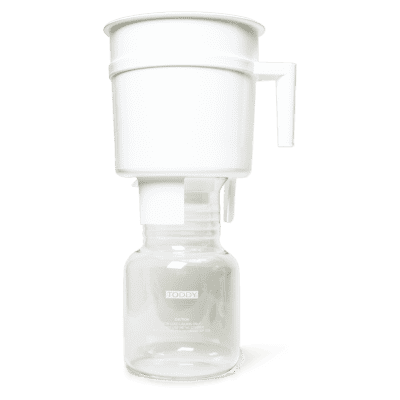
Step #7: Filter It
Then I pour the concentrate into a coffee filter-lined fine-mesh strainer set over a large measuring cup or pitcher. Some would say that this filtering step is optional, but I don’t like silt and grit in my cup. Most of the concentrate will filter through unaided, but I find it helpful to gently clear the sediment with a rubber spatula to let the last few drops through.
Step #8: Dilute It
Finally, I dilute the concentrate one-to-one with cold water and pour it into a glass with plenty of ice.
Step #9: Salt It
Now, instead of reaching for the sugar (which is unnecessary with super-smooth cold-brew) I stir in a pinch of Kosher salt. Just trust me on this one.
More from Cook's Illustrated

Equipment Review
The Best Pour-Over Coffee Makers
With the right model, even a novice can make café-quality coffee at home.Read Our Review

Equipment Review
The Best Blade Grinders of 2023
Mornings can be difficult; grinding coffee should be easy, fast, and fuss-free. Could we find a blade grinder that delivered?Read Our Review

Equipment Review
Coffee Temperature Regulator
These stainless-steel capsules regulate the temperature of hot beverages, provided that you use them in a travel mug.Read Our Review

Equipment Review
The Best Moka Pots
No two moka pots are the same. Only some brew rich, bold, and roasty coffee.Read Our Review

Equipment Review
Single-Serve Manual Coffee Makers
Can these compact, manual devices deliver café-quality results at home? We gave three models a shot.Read Our Review
Equipment Review
Cold Brew Coffee Makers
We tested 7 cold brewing products, as well as our DIY method, using our favorite medium-roast coffee.Read Our Review
Equipment Review
French Press Coffee Makers
French press coffee makers are not only elegant, but they also can potentially deliver a thicker, more full-bodied cup of coffee.Read Our Review

Equipment Review
The Best Coffee Makers (Automatic Drip)
We tested more than a dozen drip coffee makers to see if they could deliver a great brew without a lot of fuss.Read Our Review

Taste Test
Supermarket Medium-Roast Coffee
Decades after they convinced Americans to drink ultradark French and Italian roasts, the producers of blackened beans are coming out with lighter options. So how’s the coffee?Read Our Review

Recipe
Apple-Cinnamon Steel-Cut Oatmeal
We wanted creamy, thick oatmeal without the usual 30 minutes of cooking—and we were prepared to challenge centuries of Scottish tradition to get it.Get the Recipe

Recipe
Oatmeal Muffins
What should be a satisfying breakfast treat is often a dry, chewy regret. The key to a moist, tender crumb turned out to be choosing the proper oats and treating them right.Get the Recipe

Taste Test
Steel-Cut Oats
Judging from the brands and styles cramming supermarket shelves, there's an oat for almost every taste. Are any better for breakfast or for baking?Read Our Review

Taste Test
The Best Rolled Oats
We prefer rolled oats for baked goods, since their thin, flat shape gives cookies, bars, and toppings just the right amount of chew.Read Our Review

Recipe
Almond Biscotti
Italians like these cookies dry and hard, while American versions are buttery and more tender. We wanted something in between—that is, crisp but not tooth shattering.Get the Recipe

Recipe
Rose Water Pound Cake
After trying 31 pound cakes, we found that the perfect version varies the "pound-of-each" formula and relies on an unusual mixing method.Get the Recipe

Recipe
Ultimate Banana Bread
Say goodbye to dry, bland banana bread. For a showstopping loaf with a deep golden crust and velvety crumb, use your microwave.Get the Recipe
